In our previous episode, we learned about Rune-Midgarts’ Founding of the Nation Myth with the help of author and historian Koromov of the Rekenber Historical Research Group at the Geffen Library. He told us that the Geoberg royal family is cursed wherein every firstborn son in the Geoberg line is to die young!
With the help of the other priests at the Prontera Cathedral, we unlocked Bonnie’s memory hidden within the Red Gemstone and from it, we found out that her failed exorcism’s subject was the third Geoberg prince who was not cursed, but poisoned! Father Bamph repeatedly gave us the brush-off and advised us to not further involve ourselves in “that incident”.
Bamph’s Truth
While away on a grinding trip to the Sunken Ship, we receive a correspondence from Father Bamph. In the letter, he apologizes for having dismissed us multiple times despite our genuine intent to help in the investigations. He invites us back to the cathedral where he intends to tell us the truth–or at least the version of the truth from his perspective.

Arriving at the Prontera Cathedral, we are met by an apologetic Bamph. Upon forgiving him for withdrawing vital information and pushing us away, the old clergyman asks us our thoughts about how Lucy died. Based on what we’ve gathered so far, we are certain this had something to do with the White Masks. Perhaps she learned the truth behind why they’re coming in droves into Prontera, or perhaps she had taken something that they value?
Father Bamph strongly believes that it is the former. He reveals that Lucy’s mission did not only involve finding out who the White Masks are, but also had a connection to a “royal secret: the death of the third prince”. In order to fully understand this complex matter, Bamph needs to let us in on this secret, and we have to swear to keep it to ourselves.
The Chamber of Lament
The man of the cloth leads us to a wall south of the main hall of the cathedral. Although we can see a door that looks like it’s shut tight and hasn’t been opened in years, we do not know what lies on the other side. Bamph gives us a Resonance Stone which, upon use, opens a portal leading to the cathedral’s secret chamber. He walks into the portal and asks us to follow him….

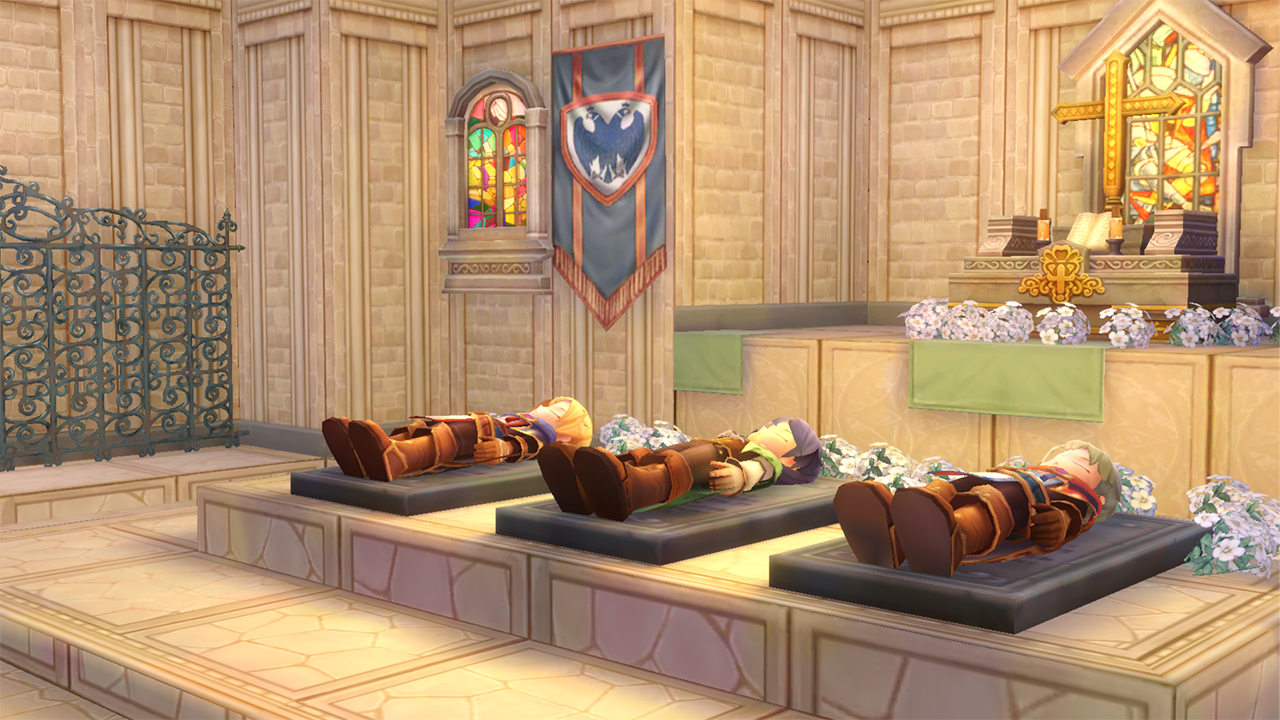
…and on the other side is a solemn room with three bodies laid on the ground. When asked what this secret room is for, Bamph, filled with sadness in his voice, discloses that this is but one of the many rooms called “Chamber of Lament” built under the cathedral. Each chamber houses one prince from the Geoberg line that had died from the curse.

However, we notice that instead of a single prince, there are three princes in this room! Bamph continues that the curse had worked the same way for centuries–the eldest prince of each generation suffered until they face their death in their sleep in the form of a horrifying nightmare. What’s strange and shocking is that not only did the current king Tristan Geoberg III’s eldest son die, but his two younger sons as well!

We hypothesize that someone might have been behind the deaths of the second and third princes, but Bamph tells us to keep this theory to ourselves for now–and he is right. We have to first learn the facts by searching for evidence before making an educated guess.
Father Bamph advises us to inspect the bodies of all three princes. But first, we have to speak to the Secret Acolyte who is to purify our bodies before we are allowed to go near the princes.
The Serpent Sigil
Standing close to the three Geoberg princes is Acolyte Ravis, who greets us by sharing what her job is: to protect the bodies of the fallen Geoberg sons. It is clear that she mourns their death and cannot understand why out of all the seven warrior-kings who had defeated Jormungand, only the Geoberg line became cursed. Expressing our sympathies, she deems us respectful enough to inspect the princes’ bodies, but we are reminded to remain respectful as we perform our inspection. We are asked to bow in front of them to honor the ancestral spirits watching over the Geoberg sons, and Ravis purifies our body.

Starting with the eldest son, we take a look at his left forearm and find a clear serpent sigil on his skin. Moving on to the second, we find the same sigil but not as clear as the first one. And upon inspecting the third prince’s forearm, we find an even less clear sigil, and its pattern appears irregular.

We report our findings to Bamph who is waiting for us near the exit. When asked what we think the cause of the third prince’s death was, we decide to tell him that it could have been due to poison. The old priest strongly agrees with our theory, and shares with us his own findings. According to Bamph, when he read the first prince’s journal, he found that the prince had suffered all his life from nightmares and “a strange suffocating feeling” which are both symptoms of the curse. There is no doubt the eldest Geoberg of this generation had died from Jormungand’s curse, but how about the other two?
We tell Bamph that we know Bonnie didn’t make a mistake during her exorcism, and that the third prince could have really died of poisoning based on what we read from the book, The Royal Part of Exorcism Prayer. He asks us how we’re so sure, and we explain that we were able to witness the exorcism ritual from having watched Bonnie’s memory crystal.
The old priest can’t help but feel guilty. He had given us the brush off when we told him that Bonnie gave us a red gemstone, which later on turned out to contain her very own memory of her final exorcism.
Bamph suspects that Bonnie was set up by someone as she was the only one allowed to be in the ritual. But by whom?

Suspicions
Finally, the man of the cloth realizes that our theory is indeed correct–the third prince was poisoned! But when asked who the person, or persons, behind the young prince’s death was, we answer that it could have been the White Masks, seeing as they have been the cause of many strange occurrences in Prontera lately.
However, the old priest has a different suspect: the Assassin Guild. This is due to the fact that every member of the guild knows a lot about poisons. One thing that supports his theory is that Lucy died at the Underground Bazaar which, unbeknownst to many, also functions as one of the Assassin Guild’s many bases.

Lucy’s Letter
Father Bamph escorts us out of the secret chamber and back into the cathedral’s main hall. This is where he intends tells us the real reason why he invited us over. We walk east toward three familiar shards floating close to the grounds–Lucy’s spirit pieces. The old priest tells us that he managed to unseal the second soul piece while we were away. When we interact with it, we find…

…the memory of that time when Lucy handed us a letter that we were supposed to deliver to Bamph! There was another letter labeled “To K.”! When asked who this “K” could be, Bamph reveals that he had sent someone else to find out. This assistant of his managed to go through the list of members of the guild and discovered that there’s only one with a name starting with the letter K who was also close to Lucy, a guy named Kidd.
Mr. Kidd
This “Kidd” is a well-known member of the guild and we are sent to Izlude to find out more information from him. Before leaving, Bamph strictly reminds us to not disclose anything about the royal family.

Arriving at the satellite town of Prontera known for its arena, we walk north to find a purple-haired Thief. He appears to be very vocal about his gambling-related trouble–having betted on an arena fighter that is now unable to fight due to a broken leg. We frankly tell him that we’re here to ask about Lucy, specifically her letter marked “To K”. Kidd agrees to tell us everything he knows if we become the fighter’s substitute and win the match for him.

Hesitant but left with no choice, we join the match and find that it’s not as difficult as we thought. We even end up winning!

Going back to Kidd who’s already celebrating, he tells us that although he was the intended recipient of Lucy’s letter, it had another letter hidden inside which he had to give to someone named “Marjana”. According to him, he sensed that it couldn’t have been just a piece of letter in that envelope due to its weight, but he refused to open it despite his curiosity. Kidd doesn’t tell us who Marjana is, but sends us to Morroc’s Underground Pub to find her. He also gives us his keepsake which we are to bring to the pub so as not to find ourselves in trouble.

The Assassin Guild
We make our way to this Underground Pub in the desert city of Morroc, where we are met by a bodyguard. He keeps sending us away and making threats until we show him Kidd’s keepsake.
Finally, we are allowed to enter the pub. We see a red-haired man behind the bar counter who seems well-mannered. We decide to approach him and ask about Marjana. But when we do, he calls someone by name of “Ether”. who turns out to be an arrogant Knight. Ether yells out that Marjana is “too important for us to see” and starts attacking us. We have no choice but to defend ourselves from his blows. Suddenly…

…a blonde woman comes out of nowhere and throws Ether and us at the wall! She then walks into a room on the other side of the pub and we decide to follow her.
The Assassin Called ‘Marjana’
She introduces herself as Marjana–the real intended recipient of Lucy’s letter! After apologizing for Ether’s behavior, she sternly tells us that we only have five minutes to explain why we’ve come looking for her. We straightforwardly tell her that this is about Lucy. And when we do, she reveals that they were both close, and that she has doubts about the cause of Lucy’s death.
Marjana vaguely mentions the letter she had received from Lucy, but will only reveal its contents if we tell her “the secret mission that led to Lucy’s death”. Keeping our word to Bamph not to divulge anything about the royal family’s connection to this case, we decide to not tell her about the royal curse. However, choosing this disappoints her. It appears that Marjana herself knows about the mysterious deaths of the second and third Geoberg prince, so we withheld that information from her for nothing.

The leader of the Assassin Guild theorizes that Lucy died because she found out the entire truth about the princes’ death! When asked what the letter contained, Marjana explains that it included instructions to make an antidote for the poison caused by a certain herb. This herb called “Oldenlandia diffusa” only grows on a Nameless Island that is part of the Arunafeltz States. Not only is it lethal, but it causes scales to grow, similar to the appearance of the scales on the skin of every firstborn son from each Geoberg generation.

In Ragnarok Online, we can find this herb when we visit the Day version of the Nameless Island map, as part of the Nameless Island Dungeon Access quest. When we walk behind the walls of the Cursed Monastery, we can find dead crows on a patch of land with some sort of plant on their beak, We also notice that the dead crows have “scaly, snake-like skin”.
When we ask Marjana for any proof of her investigations into this herb, she takes this as an insult, as if we are suspicious of her and her guild. She asks why we are involved in this case, and we tell her that we’re investigating this since Lucy had become our friend. Marjana truthfully tells how much Lucy meant to her and how dedicated Lucy was into solving this case. She also defends her guild’s reputation, saying that the Assassin Guild would never hurt the royal family.

Testing for Poison
Although she cannot send her members to help us as this case is directly connected to a sensitive matter involving the royal family, she is willing to help us personally. She asks us to collect a few items and meet a Mad Alchemist somewhere in Sograt Desert who can help us make a potion that can reveal the existence of poison on a person’s body.
Leaving the Underground Pub, we hurriedly make our way to the fountain in the middle of the city to collect some water, and then toward a market stall to procure an empty bottle. Afterward, we run toward the blazing Sograt Desert where we find a busy Alchemist who seems to be preoccupied with something.

We try to get his attention and he turns around to respond. When we tell him that we were sent by Marjana, his face brightened up. After telling him about the potion we need, he asks us to get some Deniro Acid and Piere Crystal in order to concoct this potion-testing poison.
When we return to this Alchemist with the ingredients he asked for, he mixes everything inside, gives it a little stir, and hands us the final product. Too focused on the job, we forget to thank him and simply dash to the nearest Kafra to be teleported back to Prontera.
At the cathedral, we find Father Bamph still waiting inside the secret room. We share our experience meeting Marjana, and he respects what the leader of the Assassin Guild has told us, but is not fully convinced of their innocence. He asks us to use the potion on each of the three princes.

When used on the first prince, nothing happens. But when poured over the forearm of the second and third princes, the potion reacts strongly and the both serpent sigils vanish. Father Bamph is in shock. We were right all along–the second and third prince were poisoned! But by whom?

We tell the old priest that we think that Arunafeltz is behind this, seeing as the herb came from their territory and the White Masks also came from Arunafeltz. But the White Mask cannot harm the princes as they are not allowed inside the Prontera Castle. This makes Bamph tremble in fear. He starts to suspect that someone in Prontera, perhaps someone of high rank, is an Arunafeltz spy!
Bamph is determined to find out who this spy is. He plans to directly inform the king, so he can order the knights to arrest every White Mask they spot on the streets of Prontera, or anyone from Arunafeltz!
The White Witch Engulfed in Red
The man of the cloth leads us into the main hall where he asks us to view Lucy’s final spirit piece, which he managed to unseal while we were gone. When we place our hand on the shard, we see…

…the White Witch! And she is surrounded by flames! This must have been during the fire at the Underground Bazaar. We notice that she is holding something on her right hand–a small suitcase. However, Bamph dismisses this and instead asks us if we remember anything about this White Witch. We tell him everything that happened when we first got to Prontera. Upon doing so, Bamph has the same theory as Seyren–that the White Witch took the mask away from us to keep us safe, thinking we were her ally.
Father Bamph also shows us Lucy’s autopsy report which indicates that…

…Lucy did not die from the fire, but from wounds inflicted by a sharp blade! We tell Bamph that we recall what the White Witch used to take the mask from us–Wind Magic! The old priest then theorizes that Lucy most probably died from the wounds caused by the White Witch’s wind magic. The White Witch killed Lucy! Because Lucy found out that the White Masks had poisoned the two younger princes!
Bamph advises us to investigate the White Witch, but that we should be careful not to be caught. He promises to send us another letter once he has taken the necessary steps to inform King Tristan Geoberg III.
There is no longer any doubts…. Arunafeltz was behind all this. Bonnie’s failed exorcism, the fire at the Underground Bazaar, Lucy’s death… And most importantly, the death of the second and third princes. But why?
Let us find out in the next episode of our Ragnarok Origin Main Story Lore series! Stay tuned for our next videos!